Visual Studio Pushing Master Could Not Read Password for Terminal Prompts Disabled
Welcome to the final installment of A Windows Guy in a Linux World blog post series where y'all'll learn to utilize VS Lawmaking to connect to a remote SSH host. If you lot have been following forth with the series, by now y'all should already take all of the tools and knowledge to start remotely managing your Linux machines (including editing files).
The tools covered previously are useful but they don't feel Windows-like. The Linux tools may feel foreign and hard to apply compared to a native Windows experience. In this final article of a five-function series, yous will learn how to edit files natively on your Windows car using Visual Studio (VS) Lawmaking for a more than mod experience.
Prerequisites
To follow along with the examples provided in this postal service, be sure you lot have the following:
- Visual Studio Lawmaking for Windows. This guide will be using version 1.v.i.1
- Windows x (SSH is needed and comes pre-installed)
- An OpenSUSE host with SSH enabled, and Midnight Commander installed
The Need for a Great Editing Environment
Linux does not take a central registry. Unlike Windows, virtually everything about Linux revolves around configuration files. Every change you make in a GUI, every box you tick in a spider web interface, every configuration change you brand, there'south a file somewhere that reflects that setting.
Because configuration files are so important in Linux, y'all demand a peachy text editor. Linux has a few skillful ones including the Midnight Commander text editor (known as mcedit) covered earlier.
However, this serial is for working on Linux from the perspective of a Windows user. Windows has (arguably) the best text editor on the marketplace. Even ameliorate: It's entirely compatible with the Linux remoting protocol (SSH).
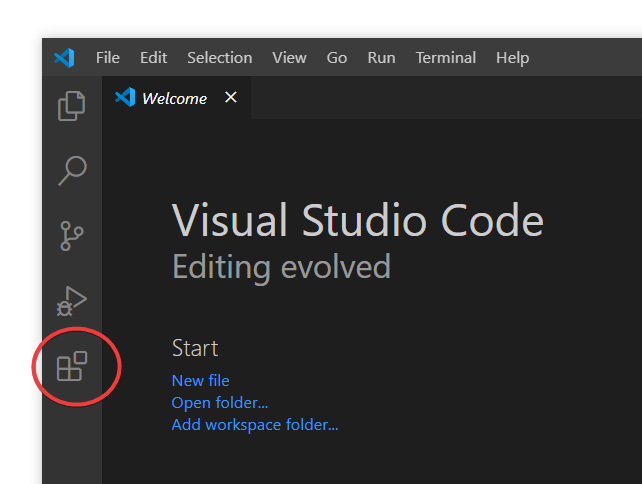
Visual Studio Code – Microsoft'south Preferred Text Editor
Microsoft makes an incredibly powerful text editor: Visual Studio Code. VS Code has taken over merely nearly every other text editor in the Microsoft ecosystem to be the master way to edit files on Windows. You may already be familiar with Visual Studio Code: it's covered frequently on this site.
Visual Studio Code is technically an Integrated Development Environment (IDE) likewise as a syntax-aware editor. This means you can run shell commands directly inside the editor as well as utilize it for debugging your scripts.
Not only can you use VS Code to piece of work with files locally, but VS Code also supports remote file-editing over SSH. Remote file-editing means that instead of navigating through the command line via an SSH prompt, you can directly open, explore, and edit files without leaving VS Lawmaking!
Installing the SSH Extension in Visual Studio Code
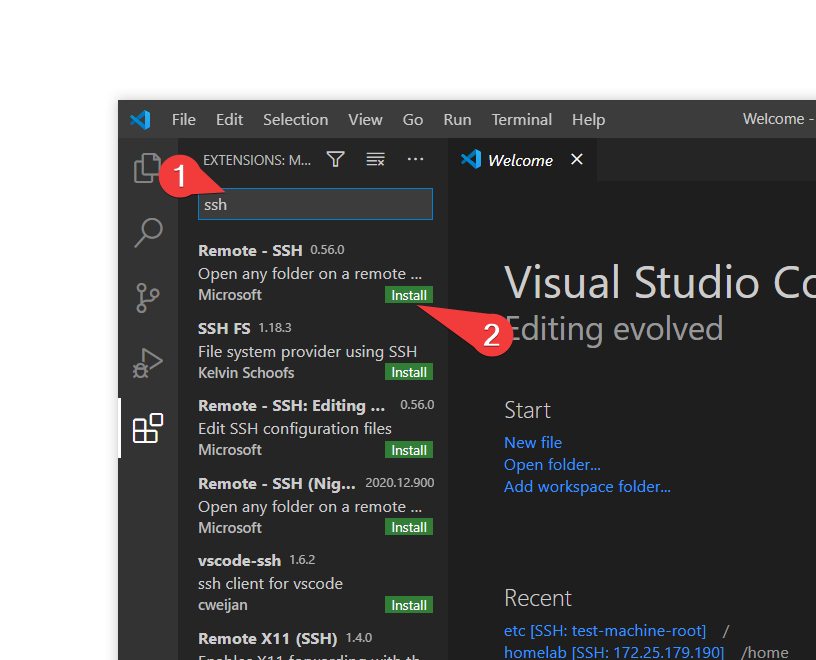
VS Code doesn't come up with SSH support out of the box but using the power of the extension marketplace, you tin can add this functionality. To do so, y'all need to install the remote SSH extension.
- In VS Code, you should see a sidebar on the left that looks like a block. Click that icon to bring up the Extension Marketplace search box.
2. Blazon ssh to search for the Remote – SSH extension as shown below. The official Microsoft extension should be the top outcome.
iii. Click the green Install button beside the Remote – SSH extension to brainstorm installing information technology.
One time installed, you should immediately encounter a new icon in the sidebar chosen Remote Explorer every bit shown below.
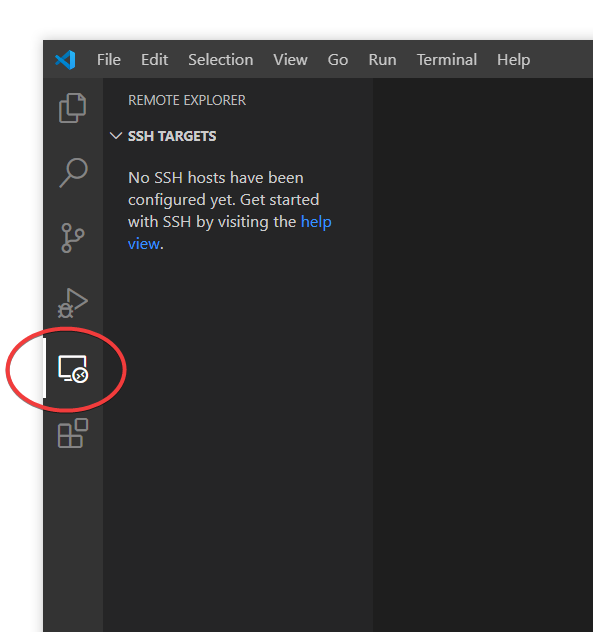
At this point, you're now ready to begin adding your SSH session.
Connecting to a Target Server with SSH in VS Code
Allow'due south now come across how you can connect to your remote Linux machine over SSH and edit some files with VS Lawmaking!
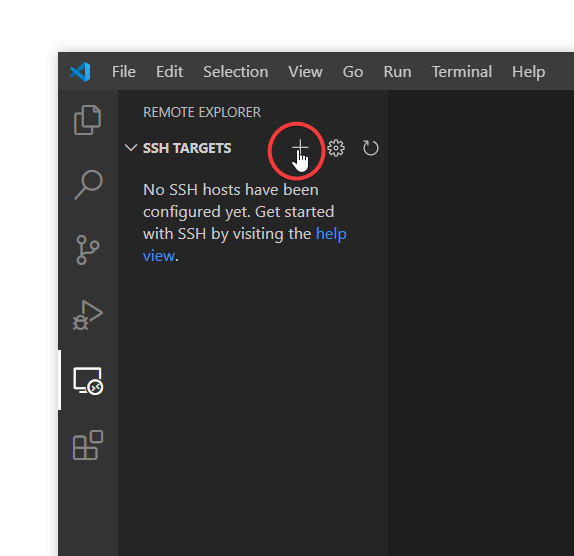
- Click the Remote Explorer icon you only installed to open the remote explorer panel.
two. Click on the + symbol in the SSH Targets box to add a new SSH server to connect to as shown below.
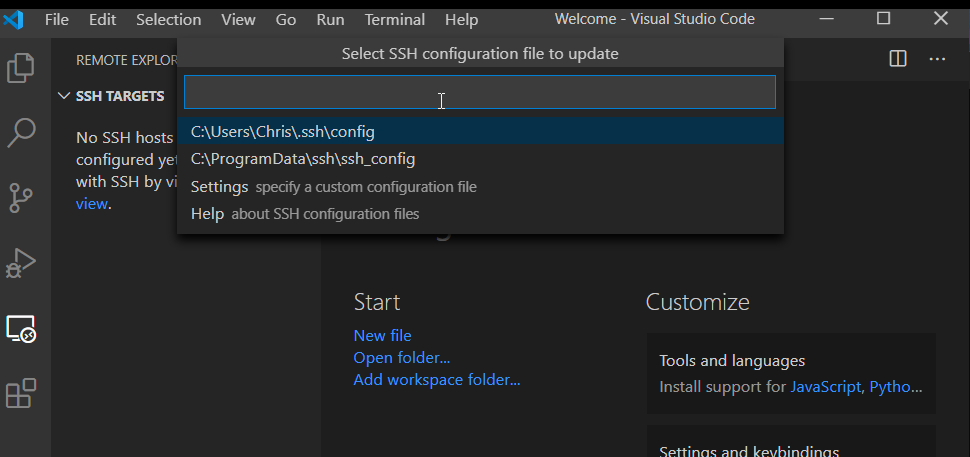
3. Input ssh <user>@ip on the prompt on your target Linux automobile, every bit described in the pre-requisites. For the example below the user is homelab and the ip is 172.25.179.190.

4. You lot should at present meet a blank prompt come up shown beneath request where to save the config data. This is the file describing all of the saved connections, in the event we accept multiple Linux devices that nosotros connect to. For this example, you can leave the box blank to save in the default location. Printing Enter to salvage the default location (C:\users\<user profile>\.ssh\config).
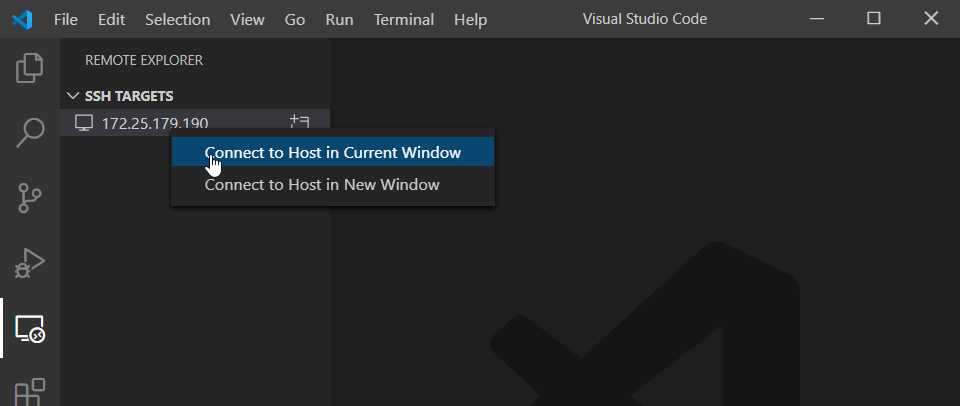
5. Finally, right-click on the newly created SSH target and click Connect to Host in Current Window. This action will connect to the target over SSH and fix VS Code to work remotely.
If all went well, you should now be able to start configuring SSH immediately in the next section.
If y'all are getting stuck at this stage, make certain y'all really tin SSH to your target calculator. The easiest fashion to test is to open a command window (on Windows 10) and exam with
ssh <user>@<ip>. If that does non work for you, VSCode volition non be able to connect either.
Configuring SSH on Your First Connectedness
Once you've connected to the remote SSH server for the first time, you'll need to do some initial configuration. Every bit you tin can see below, VS Code volition ask for the type of connexion you are making (Linux), and prompt for a password. After a short delay y'all should run across the bottom left corner plow dark-green and say SSH: <your IP>.
You're now all gear up upwardly and ready to brainstorm working with the remote filesystem!
Opening a Remote Folder and Files
Once you've connected for the first time, you lot tin and so begin opening files on the remote Linux server over SSH. To do and then:
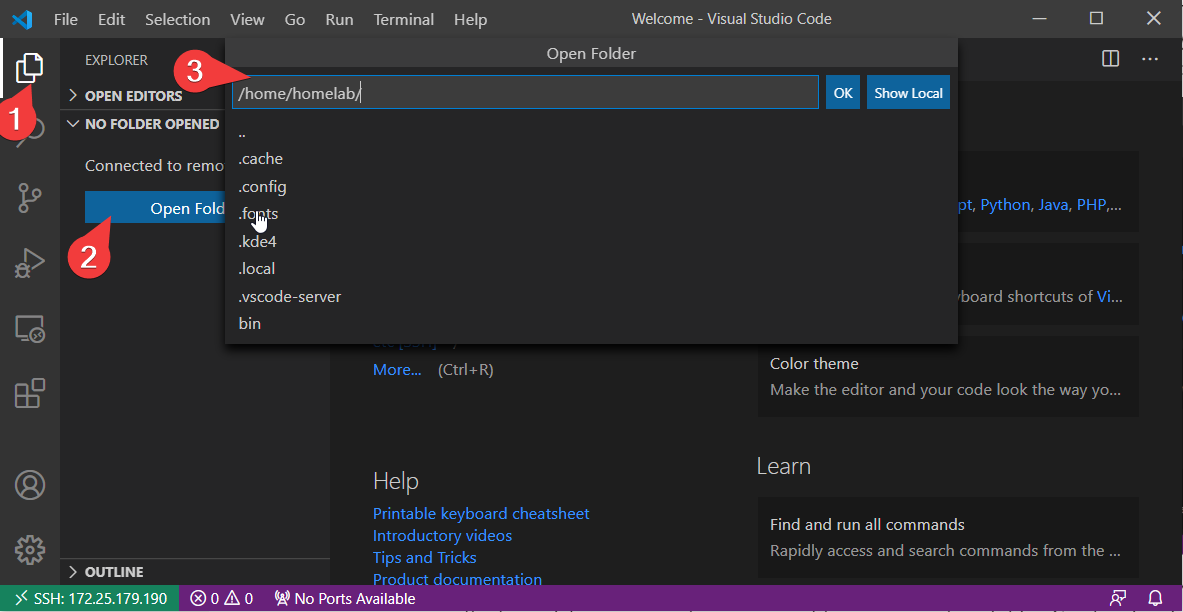
- Click on the top-left sidebar called the Explorer pane.
2. Click on the blueish Open Folder button to open a remote binder.
3. Next, choose a folder to open up. In the example below, we're referencing the /dwelling house/<username> folder.
You lot may go a prompt to enter your password again when selecting the folder.
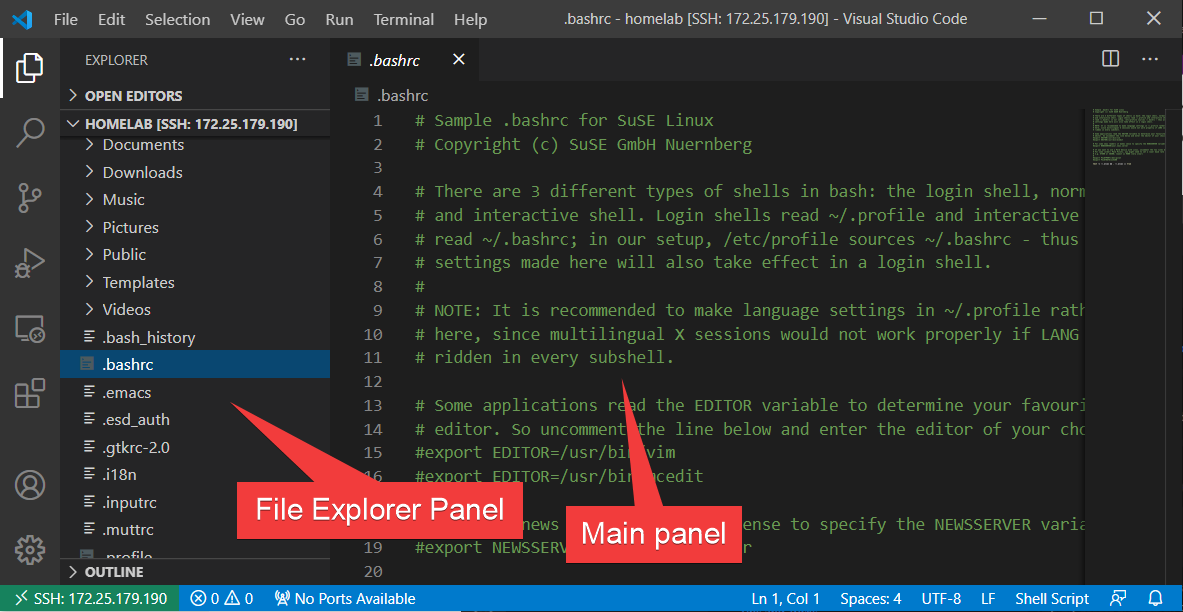
One time you have opened a binder, you lot should get a visual representation of the remote folder'southward contents in the File Explorer console shown beneath.
The base folder in the File Explorer console is referred to every bit your workspace. The workspace is the binder you opened in the previous step. You can see beneath that the File Explorer panel now shows the contents of the folder y'all opened in the concluding step.
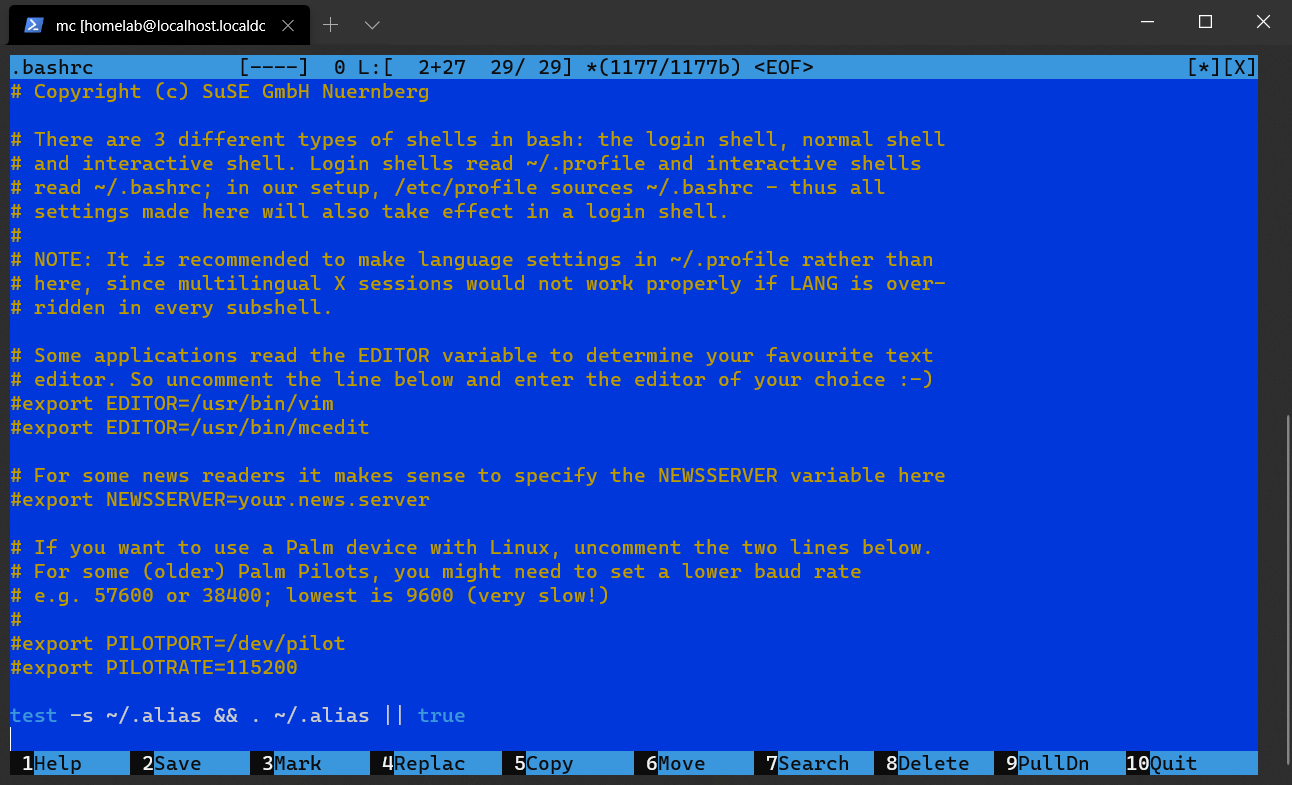
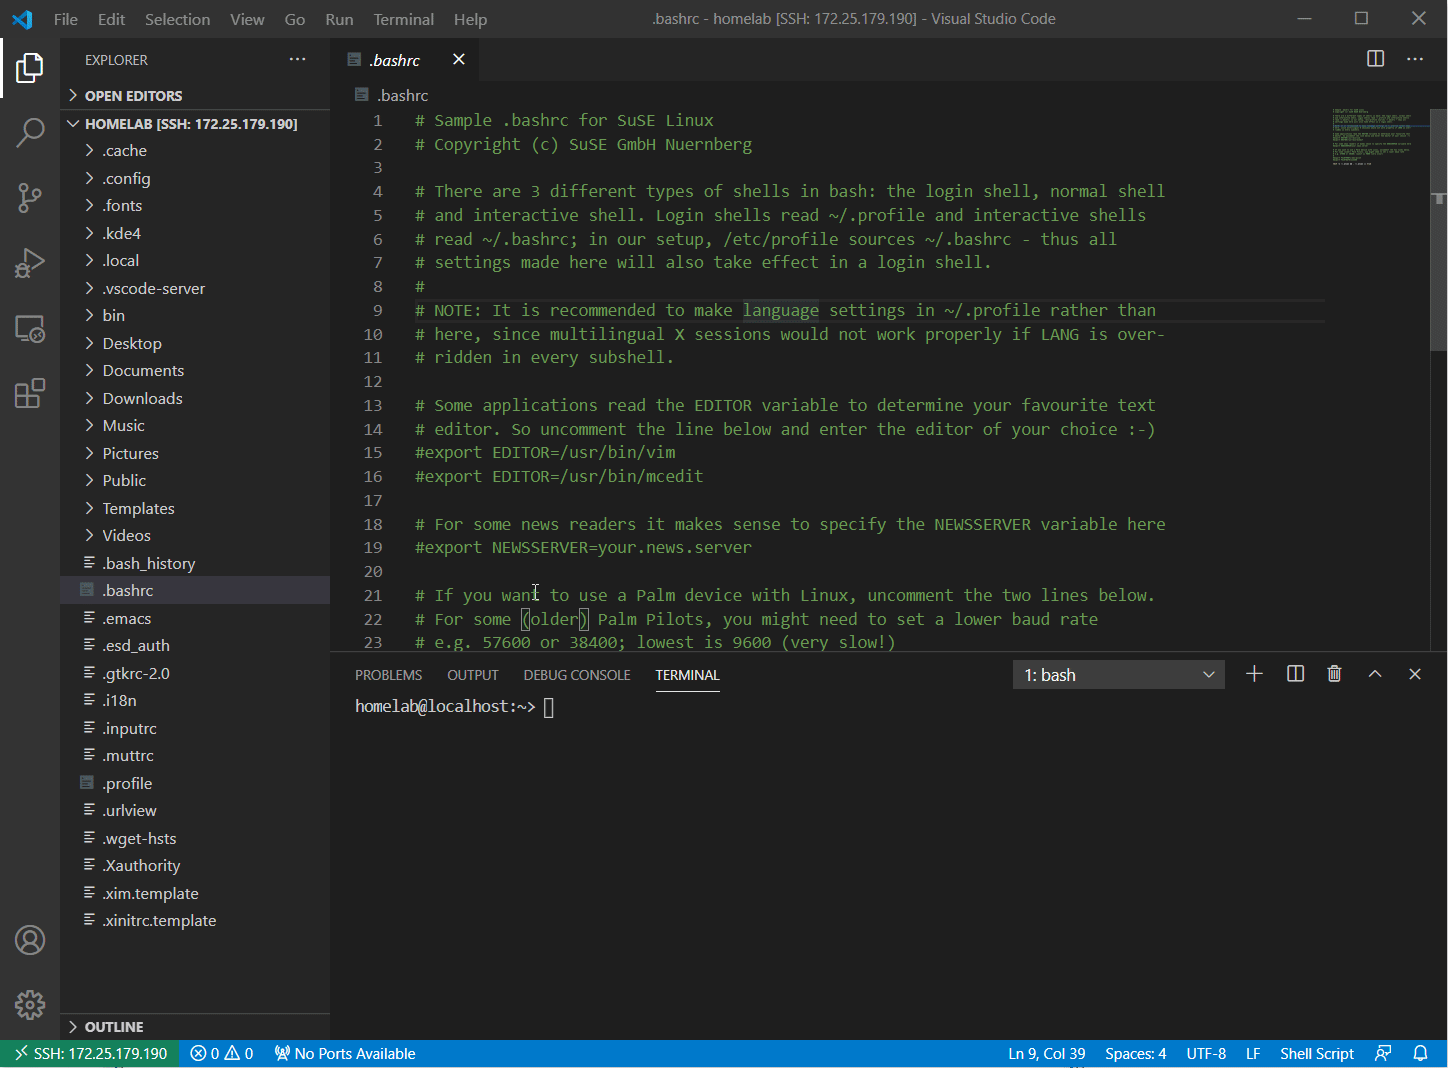
You can at present open whatsoever file (like the .bashrc file in the screenshot) and VS Code will automatically brandish it in the main panel, complete with syntax highlighting!
You tin technically open the root binder (
/) as the workspace, and therefore take access to the entire filesystem (read more on the filing system in the second role of this series). However, VS Code will have issues automatically watching for changes if the target workspace is too large. VSCode will throw a warning, and yous may have to manually refresh to see filesystem changes.
Picking a Different Working Binder
What if you lot open a folder and the files you need to work with are in a different binder? In this instance, you can open another "base" folder or fifty-fifty add folders to your workspace.
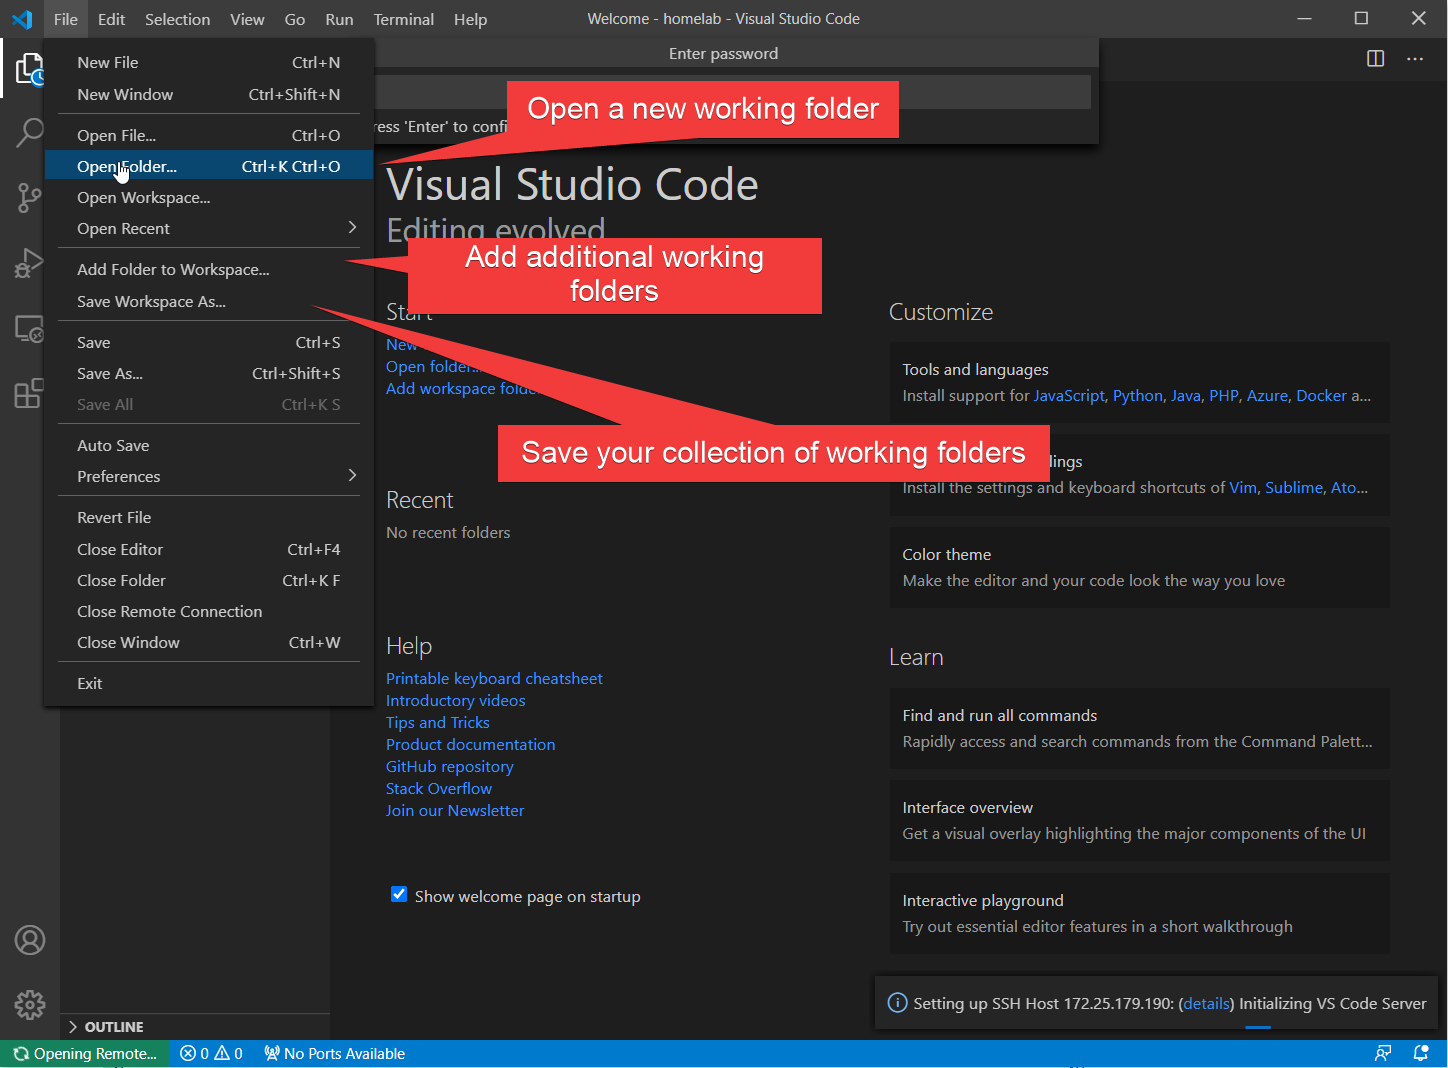
If you'd like to open a completely carve up folder (closing the last ane), you lot can do so past navigating to the File carte, clicking on Open Binder, and choosing your new folder. This action volition close VS Code and open a new workspace.
If you'd like to keep the other binder open and add another folder to your workspace, navigate to the File menu again and this fourth dimension, click on Add Binder to Workspace. From here yous can add together new folders to the existing workspace.
You can see an explanation of this in the screenshot beneath.
At present that y'all have learned how to connect to a target and open up the explorer window at a folder, lets look at what y'all tin actually do with the file explorer.
Transferring Files Between your Host and Target
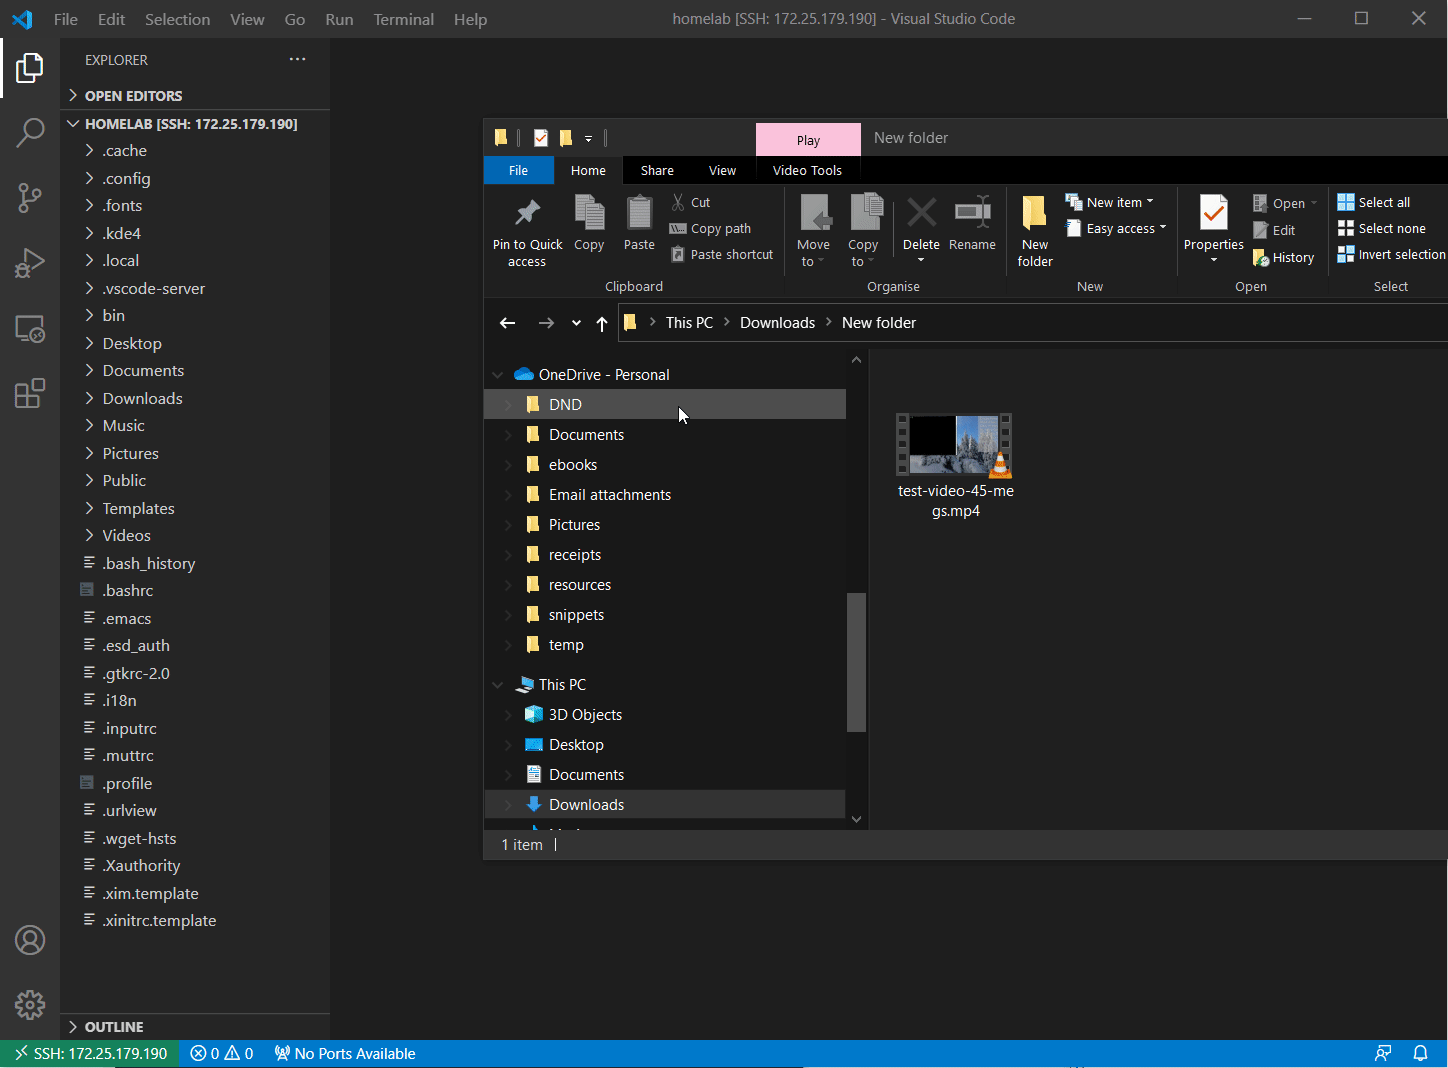
VS Lawmaking is incredibly powerful, and the explorer pane is useful for more than merely browsing and editing remote files. You can also use it to upload and download files directly to your server!
Uploading and downloading files is as elementary as a drag and drop. For example, to upload a local file to the remote server:
- Navigate to the local folder that contains the file(s) you'd like to upload to the remote server.
- Drag the file(s) from the local Windows explorer window to the File Explorer hurting in VS Code.
Washed!
To download a file:
- Navigate to the file(due south) you'd similar to download from the remote server.
- Select the file(south), right-click on them and cull Download.
- Pick a place to save them to and voila, you've downloaded the file(s).
You can see these steps in activeness below.
You can also cut, re-create, drag-and-drop, create new files/folders, and do most of what you expect out of an explorer window. It all happens remotely on the server.
Using VS Code as a Fully Featured SSH Terminal
VS Code still has one SSH play a trick on up its sleeve; you lot can also employ VS Code as a standard SSH terminal too!
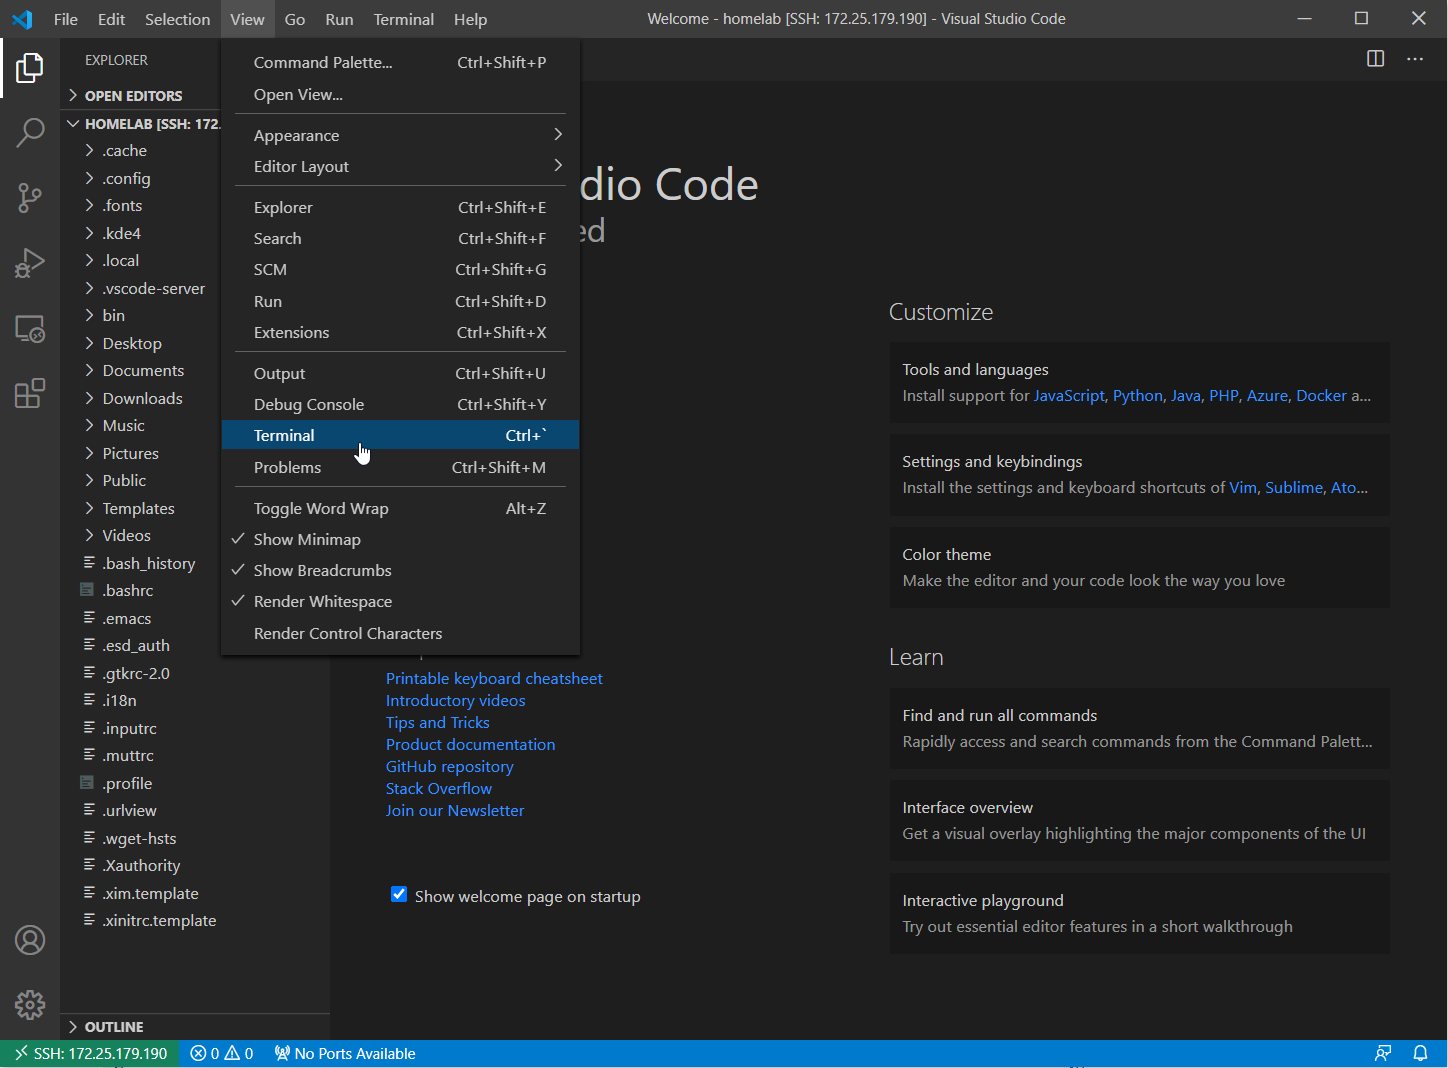
While connected to an SSH target, click on the View carte du jour and choose Terminal as shown below. VS Code will open up a remote SSH session.
You lot can practise everything in the concluding you lot can do by using SSH directly. That even includes using Midnight Commander, complete with mouse back up! You tin can come across Midnight Commander beingness launched beneath.
VS Code is using the native windows SSH client under the hood (vii.7p1 every bit of Windows 10 v2009). To get mouse support, you'll demand the Microsoft SSH client (viii.1p1 as of this commodity's writing). You can read about that more in Part Iv of this serial.
Editing Protected Configs and Modifying Protected Files
There is one drawback about using VS Code compared to the command line: It will not change files that crave administrative rights to change. These are files that you have to open up with sudo to edit. You can get around this trouble in two ways:
sudo is the style to elevate commands in Linux. It is equivalent to UAC in Windows. Rather than opening an elevated command prompt, y'all run commands with
sudoin front.
Just similar a normal SSH window, you can also run sudo commands inside the VS Lawmaking Terminal. VS Code, however, cannot save files that require administrative rights to alter. Simply you can use a tool chosen Midnight Commander (with sudo to create an explorer window inside the VSCode control line with administrative rights.
In the remote SSH session VS Code terminal, run sudo mc to open the Midnight Commander file management tool. In one case in hither, navigate to the protected files you'd similar to edit and change them as you'd like. You should have no trouble doing and so.
Actions are shown below.
The drawback of using
sudo mcfor administrative changes is fairly big: You are entirely restricted to using the VS Code terminal. This means that most of the graphical features of VS Lawmaking such every bit the explorer pane, and even the main editing window, cannot be used. Y'all are entirely restricted to the terminal window for navigation.
Using the Midnight Commander workaround in VS Code will work but you shouldn't be editing protected files that oftentimes. Using sudo mc should only be required to brand a small change or perform a once-off configuration.
If you accept files that yous are working on regularly, you should be included in the ownership or group for that folder. Doing and so negates the demand for administrative rights to be required.
Related post: Setting up an SSH Key Substitution Connection with VS Code and SSH
Wrap-Up
Thanks to everyone who stuck through this five-part series. With the configuration of VS Code, you now should be prepare to continue your journey through the Linux world.
With the concepts downwards, you now have a strong foundation to start branching off into the more than practical parts of Linux: running servers, learning docker, and setting upward your own infrastructure. Stay tuned, and wait lots more Linux related projects to pop upwards here in the future!
Source: https://adamtheautomator.com/vs-code-remote-ssh/
Postar um comentário for "Visual Studio Pushing Master Could Not Read Password for Terminal Prompts Disabled"